Tudor Purses and Pouches: A Necessary Accessory
Drawstring Bag, The Museum of London
Today women carry purses or backpacks to hold money and ID cards, makeup, brushes and other personal accessories. Men carry wallets with money and ID in their pockets, and some carry a “purse” designed for men.
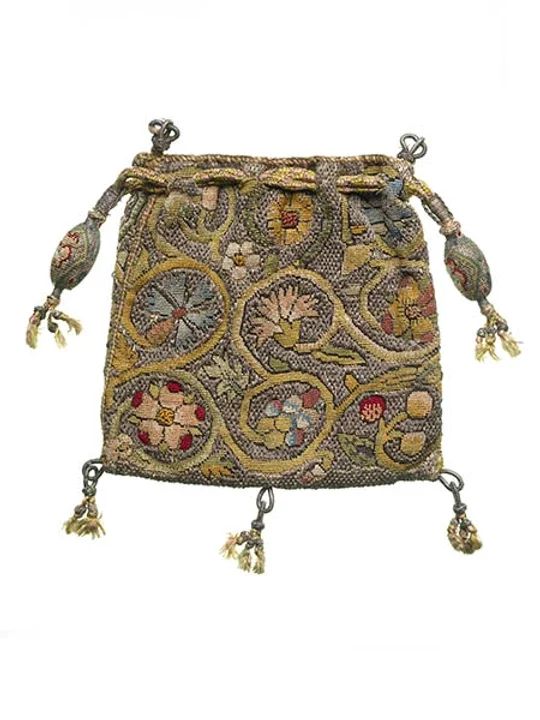
In Tudor England, purses or pouches were carried by both men and women. Men’s bags were made of canvas or leather, and women carried simple or elaborate fabric bags. The bags of wealthy women were made of silk and velvet and highly-embellished. Ordinary women carried bags of wool or linen. Many of the highly-embroidered and embellished bags survive in museums today.
Men carried their pouches attached with loops to their leather belts, while women wore theirs hanging from their “girdles” - narrow belts that sat on their hips. Bags and pouches usually carried money or perfume.
Making your own draw-string bag/purse is easy! You can fill it with money, small treasures, perfume, or even sneak in some candy like Queen Elizabeth I. She carried a “sweet bag” full of sugared violets to keep her breath fresh! Just make sure it’s okay with your parents!
For this project you will need:
A piece of felt or fabric (not too thick as you will need to cut it with scissors)
A large dinner plate (needs to fit onto the fabric with space for tracing it)
A slightly smaller plate for tracing
Pen or pencil
Scissors
A piece of yarn, string or leather (about 4’)
Optional: beads
Here is what you do:
Place your plate face-down on the felt and trace the outer edge with your pen or pencil. Make sure your mark is dark enough to see – this will not be visible on the outside when the pouch is finished.
Trace the smaller plate within the larger circle (centered).
You will now need to create the openings along the edge of the circle for your string to go through. To do this you will need to mark two ¾" vertical lines at each number position that you see on a clock – two lines at 12:00, 1:00, 2:00, etc. Through 11:00. Make sure your lines are marked on and below the inner circle tracing line. These lines will guide your cuts.
4. Cut out your large circle.
5. With the marked lines facing toward you, fold the fabric over so that two of the lines are creased at the
center. Make a small snip in the center of each folded line. *Make sure you do not make the cuts all
the way through to the outer edge of the circle.
6. Now it is time to start threading your bag. Turn your felt over so that the markings you made are
facing the table.
7. Take your string and, leaving about 6” hanging from the bag, slip the long end into one of the holes at
the 12:00 position and up out of the second hole. Continue around to the next hole and do the same.
Keep going until the string has been woven through all of the holes. *Your bag may start to bunch.
Just stretch it back out and continue. When you get to the end, leave another tail of string as long as
the first.
8. Pull on both ends to bunch the fabric up into a pouch. Your markings should now be on the inside of the bag.
9. You can put a knot at the end of each string or you can add beads to the strings and then knot
10. Add special items to your bag and tie it to your belt or even around your wrist!